
Showing posts with label WordProcessing. Show all posts

Wednesday, December 29, 2010

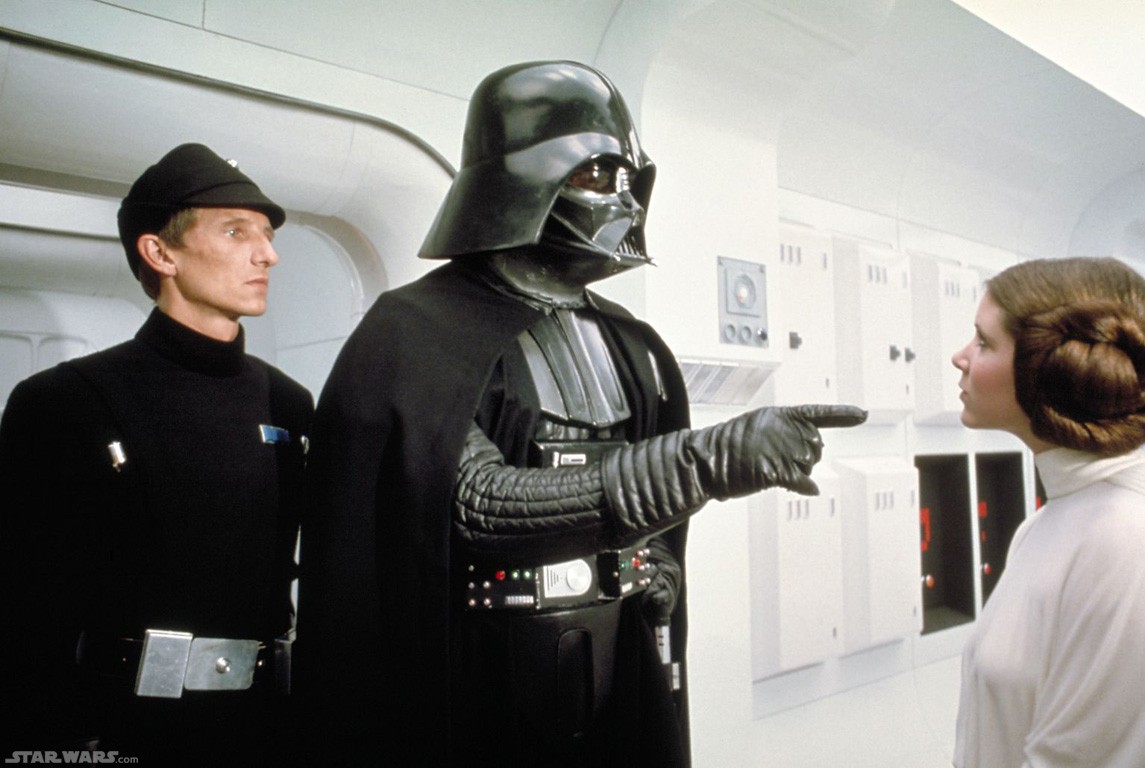
“And now, your highness, we will discuss the location of your hidden rebel base...” Darth Vader (James Earl Jones)

For years I have been making handouts to go with my classes. One of the tricks I have employed to get objects like text boxes, shapes, pictures and the like to fall in line exactly where I wanted them is the ALT key. I would select the shape and move it by holding the ALT key down. I could then fit it just the way I needed it. This has worked forever, that is until I switched to Office 2007 where I have been without my trusty tool for some time. After a bit of searching I found the ALIGN button on the top right of the of the FORMAT tab. To make the change first double click any object. Anything will do as long as it brings up the FORMAT tab then click ALIGN. You should find it at the top right. After that click the last choice GRID SETTINGS. Lastly at the bottom set the SNAP OBJECTS TO GRID check box to off and then you’re all set. This is actually better than the old way of moving objects because you do not have to hold the ALT key anymore. However I should add that on some objects like photos you will still have to change the TEXT WRAPPING to tight, square, in front of text….It’s up to you to choose what you need. So if you can’t get a piece of clip art just the way you want it try the above.

Note: Finding a matching quote for this was a real pain so I settled on this. It has the word location in it...

Tuesday, April 13, 2010

"Outer space is no place for a person of breeding. "Lady Violet Bonham Carter


One of the questions I often get in the lab from people using the Microsoft Word 2007 is what is up with the strange spacing. First what is the problem? In 2007 when you type you will notice everything seems to look double spaced. If you try to force single spacing on what you have typed nothing will change. For many of us we are used to the old system where single spacing was the norm and if we wanted to change it we would. The fix is easy. At the top right on the home ribbon you will see a section called styles. The issue lies in the word normal. Normal is already selected. You would think means single spacing. Instead it is the new style with the strange double spacing feel. The answer is right next to it. Choose no spacing and everything will work like....well.....um....normal. I do this the moment I begin a new word document but you can always highlight text and choose this option as well. Hope this helps.

Wednesday, July 29, 2009

“If you get the dirty end of the stick, sharpen it and turn it into a useful tool” Colin Powell

To begin again…
August is coming and teachers are starting to think of the coming year. Students are trying to avoid thinking at all. I know have mentioned this before but I think it needs to be restated. Google, you may have heard of it, is really useful. I recommend trying some of the other free services that Google has to offer. Now I am going to use a teacher slant with this but it could be used for any possible business or project. First off register for a Google service because once you do you will have access to all the rest of the services right away. It is free and quick. Gmail is just the tip of the Googleverse. Gmail is their version of email. One of the reasons I recommend using it is that it is searchable just like Google. This means if a student emails you during the year you can find it fairly easily. Also it does have other abilities like IM (chatting with students built directly into it) or the ability to take all emails from a specific conversation and creating a dialogue out of them instead of scattered emails through out the system. Google calendar allows for sharing of schedules and appointments throughout a group or organization. Also these can be saved to a website to make it viewable to all without registering. Google Docs and Sites are the two most underused by teachers. These together are so easy to use and useful it is unbelievable. Docs is an online Microsoft Office like set of tools. All you do is sign in and you have something that looks like Word, Excel, and PowerPoint. This alone is good but once you think of the ability to share it between others it makes it supreme. It can be viewed or editable by others at the touch of a button. Finally Google Sites is the culmination of all of these. It is creatable webpage that you can use to communicate info with groups of all sorts. As an example lets say a teacher has a book group. They can post all the info about the book they are going to read and then add photos and music from where the book is set. The great thing is that it requires no real HTML ability. If you can use Microsoft Word then you can easily use Sites. Now I know I am being very general about this post but that is what it is supposed to be. I recommend checking all the sites above and see if they fit a use. Give it a try.

Friday, January 16, 2009

“If any man wishes to write a clear style, let him first be clear in his thoughts.” Johann Wolfgang von Goethe

A while back I wrote about a website to download fonts for your projects. After a while I couldn’t find what I was looking for so I started searching around and came across DAfonts. It is a decent site that has over 8000 fonts. I love that they display all of them in a large format. Many font sites have small examples and after you go through all the trouble of downloading and installing, you realize it is not what you were looking for. The site is super simple with just what you need. It has a quickie intro of how to install the fonts and to download them just click the button to the right of any font. Fonts are good for any project. There is a strange common myth that you must install fonts for each program. This thankfully is not true. One you install a font in the system it will be available to any program that can change its writing style. I use many different fonts for Photoshop projects and Microsoft Word sheets. Give it a try and for geek’s sake, stop using comic sans.

Monday, January 05, 2009

“I was probably the only revolutionary referred to as cute.”Abbie Hoffman

I recently had to make a PDF for one of the class worksheets and I thought I would use Vista’s new PDF creator and see how it worked. Unfortunately it was an exercise of frustration and a real nuisance. So I went back to my old alternative CutePDF. Before I go on I should explain that a PDF is document formatted so it can be opened with the free program Adobe Acrobat Reader. Every government file like the 1040 tax form is in that format. It is easy to use and open for everyone who wants to read a PDF. Unfortunately the creation of a PDF can be a bit of a pain. Even though the standard has been around for years, Microsoft has been reluctant to give that ability. So CutePDF is there to bridge the gap. All you need to do is download it from the above link. Once you have gone through the installation process write your document in Microsoft Word and then instead of hitting save go to the print screen. Click at the top where you see your printer listed and choose CutePDF then hit print. It takes a second or two but a little window pops up and asks where you want to save it and under what name. Once done just hit OK and your PDF is created. The nice thing about a PDF is that when you send out something like a resume the setup does not change unlike a word document where it can be subject to their setup. Give it a try.

Tuesday, November 27, 2007

“I've been doing a lot of abstract painting lately, extremely abstract. No brush, no paint, no canvas, I just think about it.” Stephen Wright

OK I am in Microsoft Word and I just bolded, underlined, italicized a sentence. Also I decided to change the color of the text and add some other formatting changes. Now that is all done I realize I missed a word from the sentence that I did not highlight earlier. Well I could redo all the formatting step by step for that one word or I could use a very simple tool called the format painter. When in Word or Excel I look on the standard toolbar for a small paint brush. Now if you do not see it refer to this earlier post to make the toolbar appear. What I have to do for this situation is highlight the text I changed already. It does not have to be the full sentence just a word will do. Then I click on the Format Painter button which will change my cursor to a little paintbrush. Finally I highlight or click on the words I want to change. I can hold down and drag as well. This will copy the format from one place to another. Anytime I set something up and want to apply it elsewhere I use format painter. Save yourself some time and give this one a try.

Wednesday, November 14, 2007

“Genius is the ability to see things invisible, to manipulate things intangible, to paint things that have no features” Joseph Joubert

Many times people come in to the labs here at Providence Public Library and they will ask for help on a resume they had created before. One of the first buttons I press is the Show/Hide button. This usually freaks people out the first time they are seeing it. Essentially it shows all the markers that are normally invisible on a page. The reason this is so helpful is because it lets us in on how and why text is where it is. An example is a page that has a whole bunch of indented information. A person will try to add more info but it keeps moving in an odd way maybe keeping all the spaces. By pressing Show/Hide it shows us an arrow and that means the tab key was pressed here. A little dot represents a space and strange symbol that looks like a top heavy T is a paragraph marker or that the enter key was pressed. Knowing this info allows us to pinpoint the problem and usually erase it. The Show/hide button is on the standard toolbar at the top. However if it is not showing up it could be that the button is hidden. Look at the toolbar and you will probably see in the middle a double arrow. If you are not sure just point to one button after another for its name. The one you are looking for is called toolbar options. Once found click it and then choose show buttons on two rows. This will separate the toolbars so you can see most of the tools. The Show/Hide button should be right next to the percentage of Zoom meaning it will say something like 100%. Finally click the button and see all the markers. To get rid of them click the button again. Give it a try.

Friday, August 17, 2007

“Fortunately in my work there's always a choice: I can choose to do it willingly or unwillingly” Ashleigh Brilliant


For the past two days I have written about word processing for Macs so what about the larger percentage of people out there? Is there a good piece of software for word processing? Yes it is called OpenOffice. Below is a list of all that is comes with. Many people and business are turning to it because of two reasons. The price is free and it works. Give it a try.

  • Writer – a word processor you can use for anything from writing a quick letter to producing an entire book.
  • Calc – a powerful spreadsheet with all the tools you need to calculate, analyze, and present your data in numerical reports or sizzling graphics.
  • Impress – the fastest, most powerful way to create effective multimedia presentations.
  • Draw – lets you produce everything from simple diagrams to dynamic 3D illustrations.
  • Base – lets you manipulate databases seamlessly. Create and modify tables, forms, queries, and reports, all from within OpenOffice.org
  • Math – lets you create mathematical equations with a graphic user interface or by directly typing your formulas into the equation editor.

Thursday, August 16, 2007

“It is our choices that show what we truly are, far more than our abilities.” J.K. Rowling


Yesterday I wrote about the Mac software you can buy but what about those who just need a word processor and like the feel of Microsoft Word? NeoOffice is a great alternative choice. Firstly it is easy if you come from Word and second it is free. Most replacement programs, including this one, are very compatible. So if you create a resume in NeoOffice and you send it out anyone with a word processing package should be able to open it. If you would like to give it a try download it here.

Wednesday, August 15, 2007

“Happiness and love are just a choice away.”


As of this week there are some new choices for Mac users who need to do get some work done. Apple has updated and added their office software. Now the question is why do I need another software for office work when you have Microsoft Office for the Mac. In my personal opinion Microsoft made a mistake when they tried to Macify their standard office software. For a user like myself it becomes a pain to get work done because, even though I am using the same software, everything is moved around. So this being said I find it easier to use totally different software then the same that is strangely configured. Now Mac has had their own package of software called iWork. They have reworked much of the word processor, known as Pages, and the same goes for their presentation software, known as Keynote. Keynote became popularized for its use in the movie An Inconvenient Truth. They finally added the missing piece, a spreadsheet program. They call it Numbers. The reason this is exciting is the use of templates that Mac loves to use. It does make it easier and very impressive. The price is also very very competitive. It only cost $79.00 for the package compared to $400 for office. Pay attention PC users I will not be surprised if it ever came to PCs. If you use a Mac you may want to give this a try.

Friday, August 10, 2007

“There are shortcuts to happiness, and dancing is one of them.” Vicki Baum


Are you a better typist than you are a mouser? The more you keep your hands in one place, like the keyboard, the faster you will be. If that is true the more keyboard options you know will speed you up. Now I typically teach about the common keyboard shortcuts like copy and paste and so on but there are far more than you will ever be able to remember. My recommendation find actions you do with the mouse all the time and start looking for keyboard shortcuts, don’t try to memorize them though. Just start using them and it will come with time. For a complete list of the Microsoft Word 2002 keyboard shortcuts click here. Give it a try.

Thursday, August 09, 2007

“You're in pretty good shape for the shape you are in.” Dr. Seuss


The other day I created a word document that contained a picture of a friend. The problem was that I wanted the picture to be saying something and not just have text below. One way is to use speech bubbles that you see in comic strips. After you have inserted a picture into Word then click on the insert menu and point to picture then choose autoshapes. This will bring up a toolbar. Click on the second from the right, that when pointed to gives the name callouts. Now just go ahead and click on the one you like best. You will notice that your arrow has changed to a plus sign. Point to the center of the screen and hold your finger on the mouse button while you move at a diagonal until you get the size you desire, then let go. Click in the center of it and start typing. All the changes that you can make to your text can be done here like bold or italics. When finished move it close to the picture. You should also see a yellow diamond that you can move to adjust the point of the speech bubble. This is great for Word, PowerPoint, or Publisher. Give it a try.

Note: You may see something that says create your drawing here. Avoid putting your cursor here and it will go away on its own. However if you click in it it will stay and need to be deleted later.

Wednesday, August 08, 2007

“We have not come into the world to be numbered; we have been created for a purpose; for great things: to love and be loved.” Mother Teresa


When I finished yesterdays post I realized I should have written about the format button on the page numbers window. There are lots of great options for page numbering. To begin you can change the look of the numbers to roman numerals or letters. You can also add chapter numbers and change the styles of the separators. The big option here is the page numbering. Many times I am writing sheets that are a continuation of past sheets. To make the numbers jive I increase the start at and what number I need it to be. Also if you are doing a title page lower the start at page to zero. This means that the title page will begin at zero and progress from there. Give it a try.

Tuesday, August 07, 2007

“Why are our days numbered and not, say, lettered?” Woody Allen


To round out the rest of the week I plan to do some posts on Microsoft Office. Many times we have multiple pages and we need to put page numbers in. Unfortunately, because of typewriters and old programs page numbers are always considered a pain. It is rather straight forward though. When in Microsoft Word click on the insert menu and choose page numbers. You will get a menu that allows you to change the position of the page number up or down or left, right or centered. A representation of the number is on the little sheet to the right. Also if you did not want a page number on the first page then you will need to click the no page number on the first page box. Go ahead and give this a try.

Wednesday, June 13, 2007

“A word carries far - very far - deals destruction through time as the bullets go flying through space.” Joseph Conrad


Many times I use bullets instead of numbering to take away any issue of importance in Microsoft Word. The issue I have is that it automatically gives you the small round black dots you see used everywhere. There is a way to change the look of them to your own specific needs. First create a list using the bullets button on the formatting tool bar then highlight the list. Next click on the menu Format and choose bullets and numbering. Once you are there you should see a few different choices to use instead of the default. Click on any of them and click OK. They will change to your new selection. However if you want more choices for change get back to the window to change the bullets and click customize at the bottom right of the screen. Here you can click on picture to get all sorts of different looks. Also you can choose character to look through all the font choices. Each font can have hundreds of different choices. Some, like wingdings have all the unusual ones like religious symbols and tiny phones and computers. When you click on the one you like then click OK and the OK. They should have changed. Give it a try.

Tuesday, June 05, 2007

“Good words are worth a thousand pictures.”

A recent question from a student was about inserting pictures in Microsoft Word Documents. She asked why everything moves around when a new picture is on the page. This is a very common issue. The problem is one of layout. If you click on a picture in your document and then go up to the format menu and choose picture. This will bring up the format picture window. Click on the layout tab and then choose anything but in line with text. That one is the default and pushes the text all over the place. I personally like square or tight. This forces the text closely around the picture. You can also move it around wherever you want it. If you choose in front of text you have total freedom to place it anywhere. However be careful of using the behind text because it may be a pain to select later. This will help any document where you use pictures. This also includes autoshapes, clipart, and wordart. Give it a try.

Tuesday, May 15, 2007

“Computers make it easier to do a lot of things, but most of the things they make it easier to do don't need to be done.” Andy Rooney


Is there an easier way to do labels that to use mail merge? I have been asked this repeatedly from students. The answer is yes and no. First what is mail merge? When you want to print a bunch of labels at once you can create a database of names and addressees in Excel. Once you have completed this then you go to Microsoft Word and use their mail merge feature to import all the data. The problem is that this can be a hassle and seriously confusing. Also each version of Word is very different from the last. Now if you want a list that you can use for all your projects , different size labels or envelopes, then mail merge is the best way to do it. However if you want a list that is on one type of labels than there is an easy answer. Avery is the maker behind many labels that you buy. Even if you buy the generic brand it will still come with the Avery SKU number. This is usually a four digit number like 5160, common mailing labels. Avery has a set of templates that you can download and the open in word. They have all the lines laid out on the page so all you have to do is type in the boxes and your information should print perfectly on the label sheet. I use this all the time. I bought some small round labels for some spice jars. I got sick of using Cayenne instead of Cinnamon. So I downloaded the template filled them in and printed them off. Give it a try.

Monday, April 02, 2007

“It isn't writing at all - it's typing” Truman Capote


. I am not the greatest typist on the planet so most times I look at the keyboard while I type. I look up and notice that I left Caps Lock on and everything is in capital letters. In the past I have erased all the information but there is an easier way. If you are in Microsoft Word select all the text abd then click the Format menu, choose change case and a menu will appear. You can choose all sorts of cases. To make the change from capitals to lowercase just choose lowercase and press OK.Give it a try!

Thursday, March 22, 2007

“Think off-center.” George Carlin


A question I received in class recently was "how do you center text vertically and not just horizontally?" The question is a good one because people handle it in different ways. Lets say that you are writing a term paper and you want the title of the page to be perfectly centered. I find most people use the enter button until they feel it is close to center. This is not a great way to do this because for each enter you tell Microsoft Word to mark a space. This can be problematic later on when correcting or editing. There is an easier and more exact way to handle this. Click on the the File menu and the choose page setup. Then choose the tab layout at the top. In the center will be something called vertical alignment. Here you can choose top, bottom or center. This will make it exactly centered on the page. When you type it will move both up and down at the same time keeping that centered spot. Later, when you are on your second page you can go back into page setup and choose from the bottom menu "from this point forward." Don't forget to change the vertical alignment back to top and then press OK. You will end up with two very different setups for each page. Give it a try!

Wednesday, February 07, 2007

“Few things are harder to put up with than the annoyance of a good example.” Mark Twain


Every time I teach Microsoft Word or any of the Office stuff someone always says they hate and despise the assistant that is supposed to help but all he does is annoy. The idea is that you would have this helpful friend when you needed him. In practice it is a constant annoyance that is always in the way. So how do I get rid of this creature? When you have Word open, click on the assistant. If he is not there make him appear by clicking on the Help menu and choosing Show the office assistant. Ok now that he is in our sights, give him a click and then one more on the options button. Now we have all the choices at our fingertips. The easiest option here is to unclick the checkbox for "the use the office assistant". After that he will not show up anymore. However you do have other choices like when or if he comes out to help or if he makes sound or not. Also if you actually like the help but not the look of the helper than you should click gallery and change him to your liking. Years ago they had a different assistant, a butler, this made more sense to me than a paper clip. It was a butler. Show your assistant who is boss and give it a try!